Log in to join the conversation.
Let's go to Japan - Insert - Sleeved with Lids
Please support Keweico by Liking/Boosting their Print on MakerWorld.
Hey everyone!
OneirosDream uploaded a great inlay for the german retail version of Let's Go! to Japan. (Inner dimensions of 231mmx231mm). He did a great job and future-proofed the inlay for additional addons and a 5th player.
However, I really don't plan on upgrading my game and I prefer to have lids on my inlays because I store my games vertically.
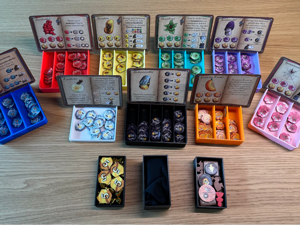
That's why I took inspiration from OneirosDream's inlay and used some of his dimensions and made a new insert with lids. I used the great tool on https://deckinabox.sgenoud.com/token-tray-fdm to build the boxes. Some infos:
• Even though my game only has material for 4 player, I designed 5 trays. The fifth is used for the round and +12 markers.
• To get a perfect fit I designed a “filler” box. Could be used if one gets a expansionen later on anyways.
• Designed for docsmagic premium sleeves (72x122mm, 100 micron).
• I designed one of the top trays to have a little hole in it. That way it's easier to lift it. On the bottom trays you can lift a player-board easily, that's why I didn't design a hole in a lid on this layer.
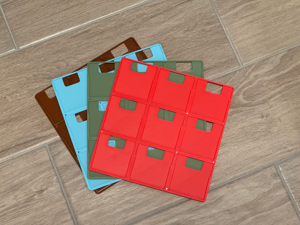
• You may print the optional point-sheet holder. It has the same height (5mm) as the full point sheet and will create a perfectly flat layer on top. However I do not feel it is needed. There is very little wiggle room and even if there is, everything has lids anyway :)
• To save filament you may print with 0 top and bottom layers with 15% honeycomb infill. You may also put a hole (50x90mm works nice I think) on the bottom of the card trays. Saves an additional 10g per tray.

/pic9592422.jpg)
/pic9147920.jpg)
/pic8134653.jpg)
/pic8134660.jpg)