Log in to join the conversation.
Eternal Decks insert (no lid lift)
Please support DesolationSong by Liking/Boosting their Print on MakerWorld.
This is a modified version of the insert originally made by Archipanda.
There are several inserts available on MakerWorld for Eternal Decks.
When deciding which one to print, I was looking for the following:
• enough space for sleeves (I use Paladin sleeves, which are not the thinnest),
• ideally zero lid lift (after potentially removing some components).
The insert by Archipanda seemed to be the one best suited for these goals.
On the other hand, I thought there was room for some improvements, such as:
• engraved text on the boxes, for easier sorting of the cards,
• more divisions in the token boxes, for better separation of tokens.
These modifications have been implemented in the current insert.
I thought this was sufficiently different to warrant a remix.
On top of this, I wanted to provide more in-depth information for printing and setup.
Printing components
You should print the following components:
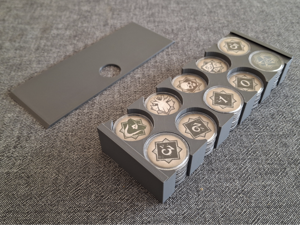
• 3 large deck boxes for the eternal decks (two separate plates for boxes and lids),
• 1 medium and 2 small deck boxes (again, on two separate plates),
• 1 large and 1 small token boxes (two separate plates for boxes and lids),
• (optional) dividers for the deck boxes.
Achieving zero lid lift
Some (unimportant) components have to be removed to achieve zero lid lift as in the picture:
• one set of rulebooks (that is, keep either the English or Japanese ones),
• 3 of the player aids (I keep 1 one rules aid and 2 ability aids, but up to you).
Arranging the insert
Setting the components in the box is fairly straightforward, as shown in the pictures.
• Put the cardboards at the bottom (with removal as above) and the small token box.
• Put the large token tray box on the cardboards and the "player cards" box on the small box.
• Put the "gatekeeper cards" and "purple cards" on top of the large token box.
• Put the "eternal decks" on the bottom on the opposite side of the box.
• Put the mat in the middle (see below for some detailed folding instructions).
• Put the rulebooks on top (perhaps on opposite orientations to minimize any lift).
Folding the mat for storage
It is a bit tricky to properly fold the mat for storage in the box.
I have included a picture that should illustrate process (and as future reference for myself):
• keep folding in halves until you reach the shape depicted on the left of the picture,
• now fold this part into thirds, which should bring you to the top left part of the picture,
• give it one final half fold, after which the mat should neatly sit vertically in the box.