Log in to join the conversation.
7 Wonders Architects game - Wonder Tokens
Please support GC3D by Liking/Boosting their Print on MakerWorld.
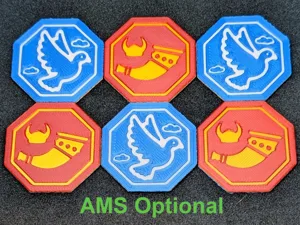
These are Wonder Tokens so that players can randomly select wonders at the start of the game of 7 Wonders Architects . I also made upgraded Conflict Tokens for this game.
Included : Models/profiles for users with an AMS OR without an AMS (change colours by layers, with pauses).
Included : Two versions for each of the above:
• KIS version for quick print where all the wonders are the same colour.
• Fancy version where you make each wonder a unique colour, likely to match the boardgame artwork.
• They look best with smooth finish, so use a smooth build plate if you have one, and have Ironing on (it's on in the profiles).
• Silk PLA looks good if you have it. It's what I'm showing in the pics.
• Keep the 0.2mm layer height. Essential to match colour changes.
• A 0.4mm nozzle is fine. I reworked the original 2D artwork to work with the low resolution of a 0.4 nozzle.
Four print profiles (3MF files) are included, to give you options. You only need to use one of them to create a full set of Wonder tokens, so take your pick:
No AMS - KIS Single Colour Wonders AMS: KIS Single Colour Wonders
No AMS - Mixed Colour Wonders AMS: Mixed Colour Wonders
Additional details for each profile are provided below if needed. And you might like these upgraded Conflict Tokens .
I work hard to make good designs, printing and refining the designs to make them as good as possible. If you like my work, then please Like, Rate, Follow, and Boost if you can. These actions all help to reward designers and encourage us to make more. Thanks!
Boost Me Boosting is free and it really helps. Thanks in Advance!!!!
Easy: just change your colours at the pauses in the profile. Just one build plate for all 7 wonder tokens.
Filament changes by layer are in the profile. Make the changes match the desired colours in your AMS. If necessary, delete a colour change and add it again to match your filaments. Just one build plate.
This profile uses modifiers to insert the colours into the model. Set the colours of these modifiers in the Object view of Bambu Studio on the left side of the screen, per this pic, showing orange for the Gizeh wonder, maroon red for the Rhodes wonder, and baby blue for the bottom inset colour (for the “7”s on the bottom). And white as the main colour:
There are multiple build plates, with two wonder tokens per plate, which works with one AMS with four colours. Print the plates one at a time and change filaments between prints for the next pair of wonders.
To get a nice print without an AMS, the tokens are split into two pieces: a “shell” and an “insert”. The shells are all the same and are printed in one colour, the main token colour. The inserts are unique, each with the graphics for one wonder, giving you the opportunity to choose the inset colour for each wonder, as well as the bottom inset colour. …all just by changing colour by layer at pauses.
Print the seven token “shells” on the first build plate in your primary token colour (white in my samples).
Then, with the second build plate, use the Object view of Bambu Studio to make exactly one of the wonder inserts printable, as shown here:
Then print in this sequence:
• Load the bottom inset filament colour first, start the print and…
• At the first pause, switch to the inset colour for the current wonder.
• At the second pause, switch to the primary token colour to finish.
• Remove the print, return to the Object view in Bambu Studio to make a different wonder insert printable, and repeat.
• When all seven inserts and shells are printed, glue the inserts into the shells.
• Enjoy!

/pic7796076.png)