Log in to join the conversation.
Rumble Nation Game Insert
Please support David A by Liking/Boosting their Print on MakerWorld.
An insert for the board game Rumble Nation!
• Accommodates sleeved cards, even with thicker matte sleeves
• Fits inside of the original cardboard insert
• Optimized for quick setup and cleanup, with minimal table sprawl
• No lid lift
• Supports vertical storage
• No chance of anything sliding around and getting jumbled
• Finger gaps are large and, where applicable, extend underneath components to make everything extremely easy to remove
• Meeple trays have curved edges and slightly slanted walls to make it super easy to pull out those last few pieces
• Special slots for Daimyo meeples so they aren't accidentally mixed in
• Nice chamfers and fillets, to prevent elephant's foot issues and so that everything feels nice
I redesigned this thing way more times than I expected, but am extremely happy with the result.
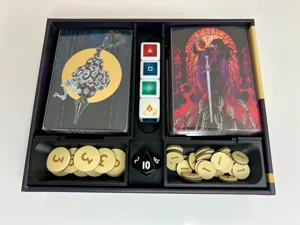
The Daimyo cards are not always used and only some of the Tactic cards are used, so both live in the bottom of the box. Not using the Daimyos? You don't even have to touch the Daimyo cards, nothing is stored under them. Finished setting up your game? The extra Tactic cards go back in the insert. When the game is over, drop the used Tactic cards on the others and you're done putting all the cards away. None of that “pull things out to store things under them” shuffle that inserts sometimes require, and having the cards on the bottom keep them from sliding out of their wells, e.g. when the box is stored vertically.
The cards sit 2mm above the base of the box and there's a good gap between them that extends well under each deck, so taking the cards out is easy. To accommodate sleeves, the wells were enlarged quite a bit. Here are their dimensions:
• Daimyo card well: 124mm* long, 84mm wide, 4mm deep
• Tactic card well: 92mm long, 67mm* wide, 8mm deep
* The wells do not have walls on one side, so actual available space in this direction is slightly larger by some variable amount
I straight-up doubled the thickness of each deck, and went several millimeters larger than the sleeve outer dimensions I could find, so even the thickest and most premium of your sleeves should be fine. If you're concerned, please measure your decks before printing to make sure they'll fit. And if for some reason they don't, please let me know and I'll try to make adjustments!
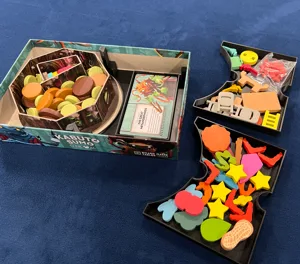
The reinforcements are in a large, clean tray with sloped sides on either end. It's too shallow for 2 reinforcements to sit on top of each other, but it's also so wide and long that it shouldn't ever be a problem.
While I normally prefer open trays to just dump tokens into, because the castles are so large it would have been impractical and I needed to have cutouts for them to get stacked into. However, the clearance around the tokens is generously wide, so it's painless to put them in or take them out. The slots are also circular so that their orientation doesn't matter. For each size, 5 castle tokens go on one side and 6 on the other, but the wells are equal depths so that it doesn't matter which has 5 and which has 6. Finger holes extend underneath so that removal is easy.
The sword slot is similar, with plenty of clearance and a finger hole that extends underneath.
Each tray has a slot for that color's 3 dice and a slot for the Daimyo. Both slots have plenty of room for fingers in all relevant directions. The soldiers get tossed into the large open tray (don't worry, they're battle-hardened and can take it). One side is sloped to make the last few easy to pull out.
In the 3mf file (and in my own prints), I printed the top 1mm of each in the player color. Not at all necessary—the trays and player components are otherwise interchangeable—but I thought it looked nice.
There's nothing tricky about this print. No tight tolerances, no overhangs, etc. Just about any settings should work. But the provided 3mf file and official print profiles use these settings, which are identical to what I used:
• 0.4mm nozzle
• 3 wall loops
• 15% support cubic infill
• 60mm/s outer wall speed*
• Variable layer height for the reinforcements tray and player trays
* Reduced outer wall speed helps prevent both shrinkage (which my tan PLA filament is prone to) and that weird issue where sometimes the outside of the print looks like the sheen changed partway through (which is generally caused by print speed changing from one layer to another)
I personally added ironing with these settings:
• Ironing type: top surfaces
• Rectilinear pattern
• 60mm/s speed
• 35% flow
Those work beautifully for me on my Bambu A1, and many of the surfaces have a near-perfect top layer. But since ironing seems to be really printer- and filament-dependent, I excluded them from the 3mf and print profiles.
The 3mf and print profiles are configured for an AMS or other color-changing system that supports 3-4 colors. That's why there are 2 player trays per plate: print the body all one color, and then switch to multicolor for the last 1mm.
Without an AMS, it should be simple to pause the print before the last 1mm and change the color, but be sure to print only 1 player tray at a time when doing it! Otherwise of course you're going to end up with 2 of the same color.
For those curious, I did test printing each tray individually with a single color change vs. printing 2 on one tray with the several color changes that required. It used almost exactly the same amount of filament and took almost exactly twice as long. I guess the reduced time and waste from printing only 1 at a time was offset almost exactly by the extra startup time and preparatory purge.
I printed mine almost entirely in Elegoo Beige PLA, and found it matches the game's art almost perfectly. The filament was prone to shrinkage, but overall I'm very happy with it. I used some generic blue, red, black, and yellow filaments for the tops of the player trays, no special shades or anything.