Log in to join the conversation.
Magnetized Board Game Token Cups
Please support Pmdage by Liking/Boosting their Print on MakerWorld.
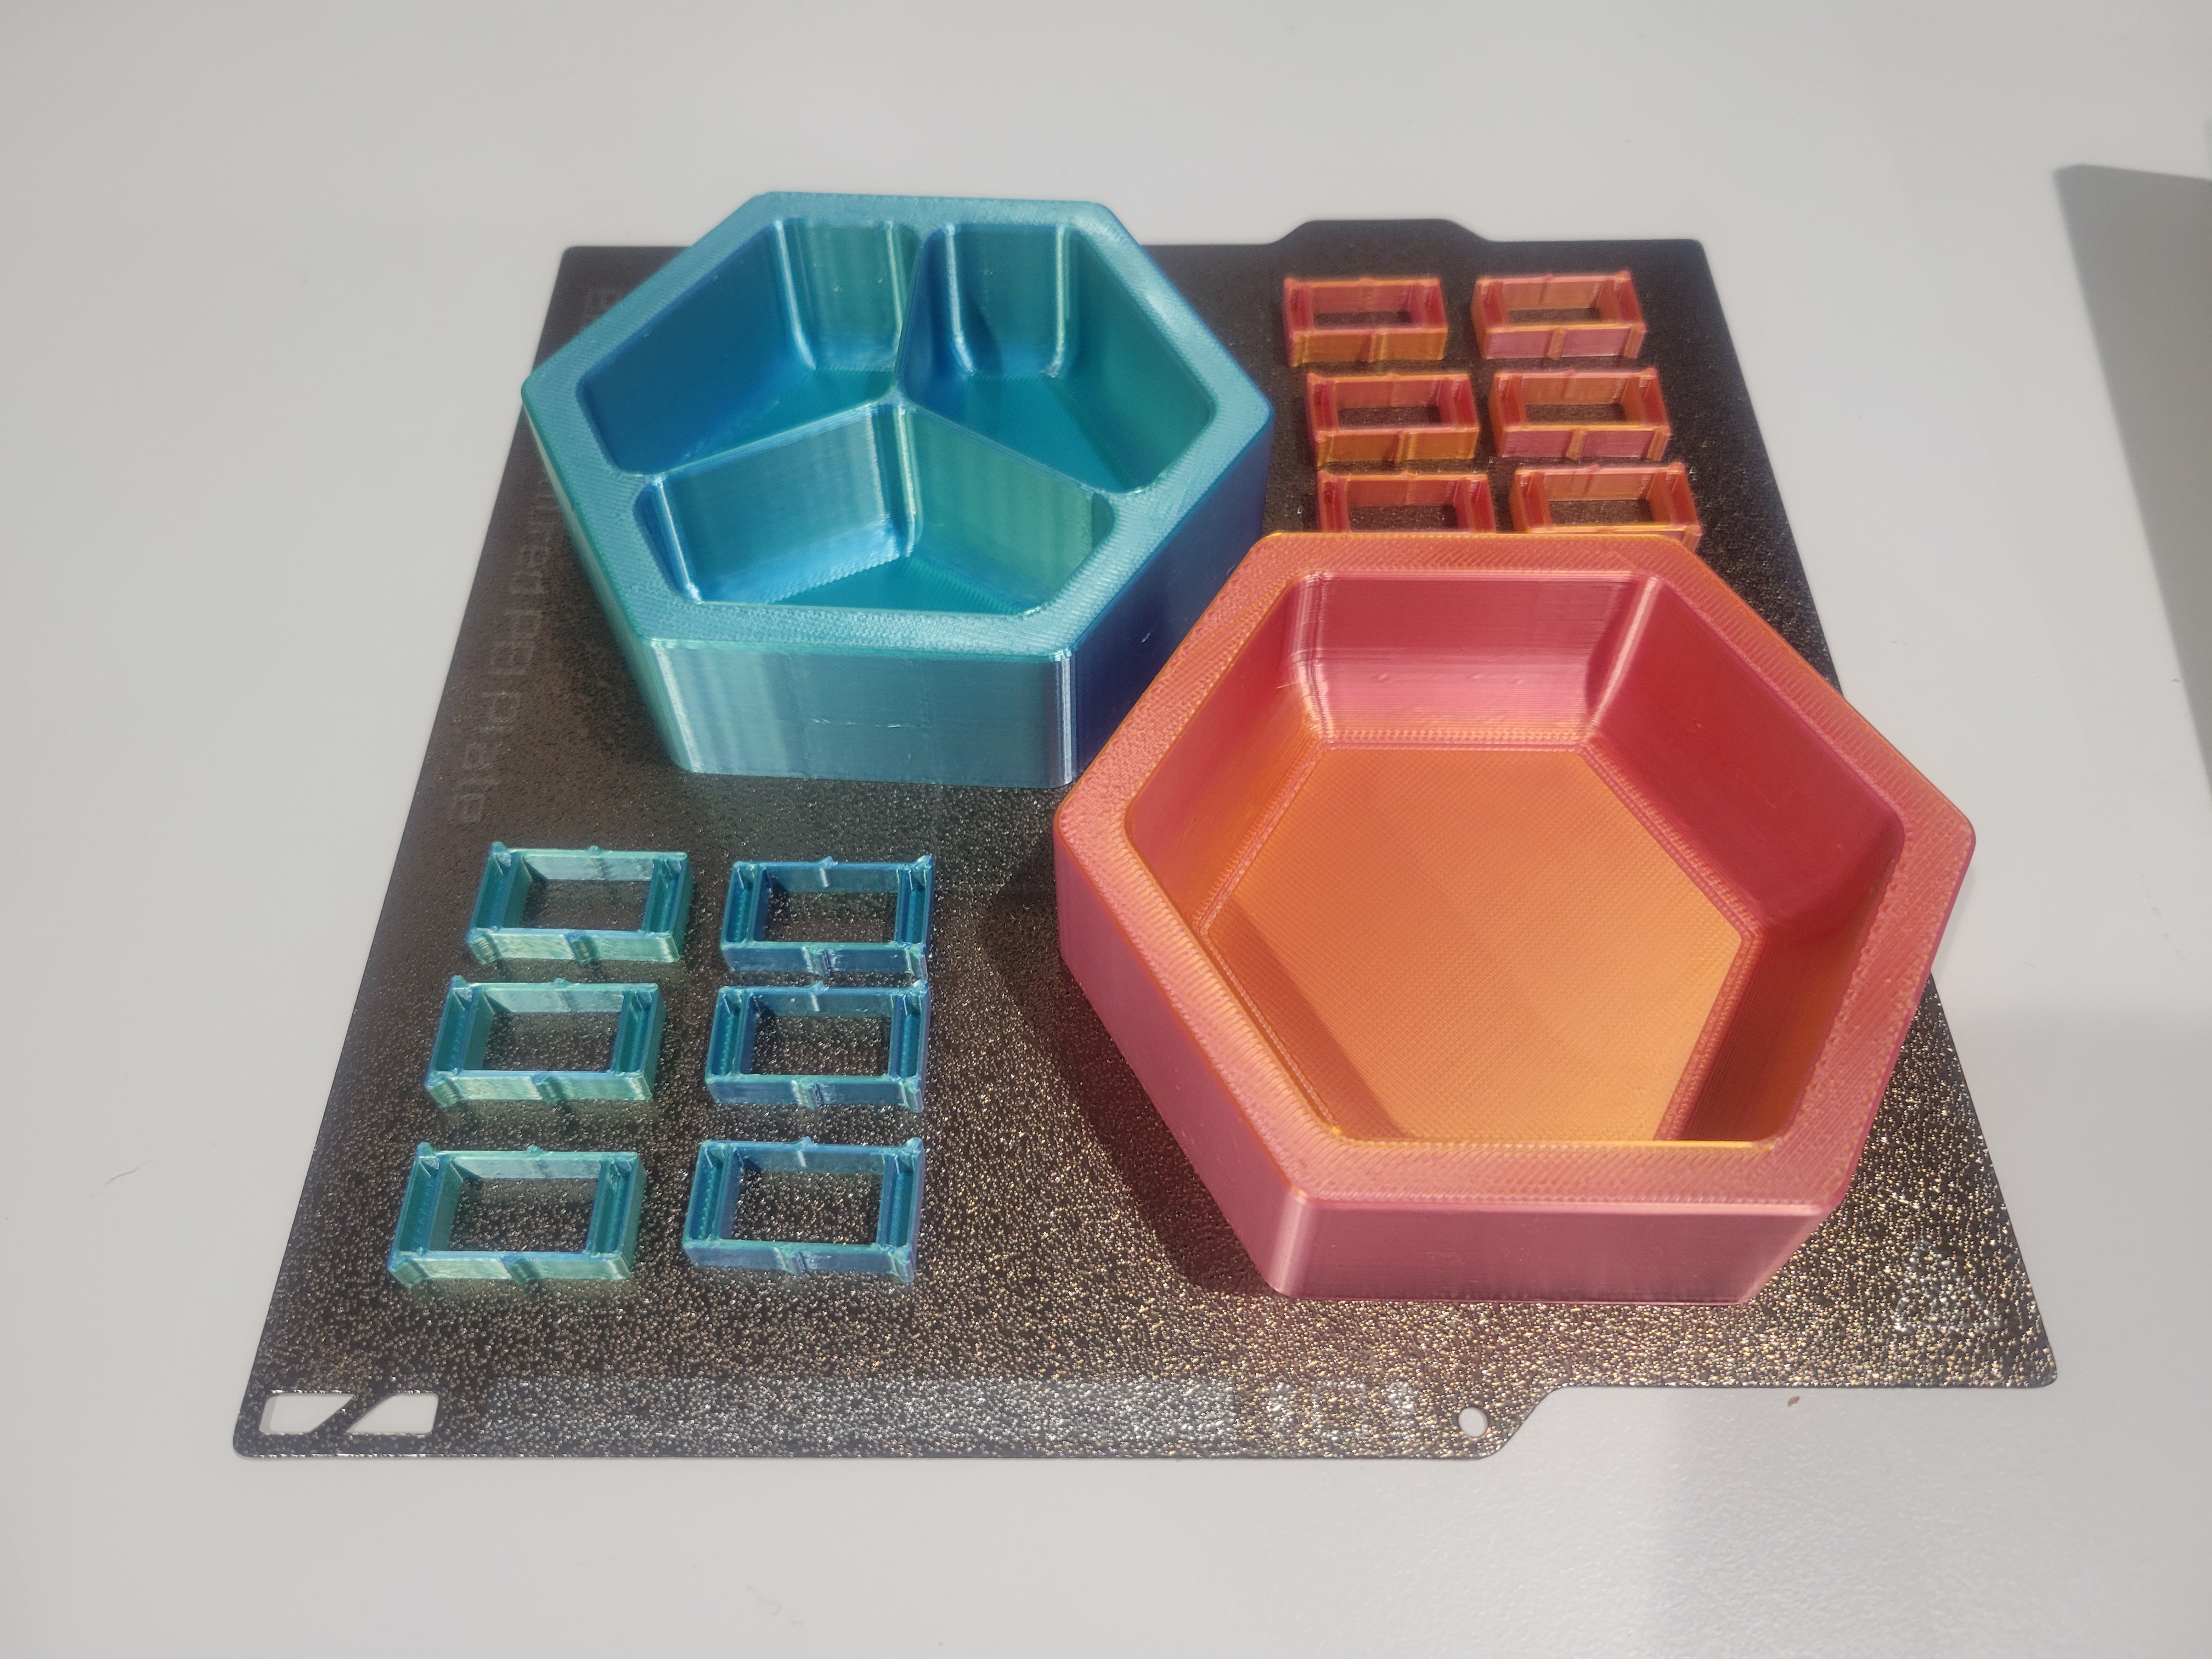
If Ikea made token trays, they would probably look something like this. These trays were designed with both function and style in mind.
Yes, the bottoms of each tray are smoothed to make picking up tokens much easier.
• Ikea-style minimalist design
• Smoothed bottoms for easier token pickup
• Magnetized system connecting from the top, bottom, and sides
• Multiple tray and module options
• No visible magnets. No glue. No tools. No print pauses.
• Requires magnets, cross-compatible through various sizes
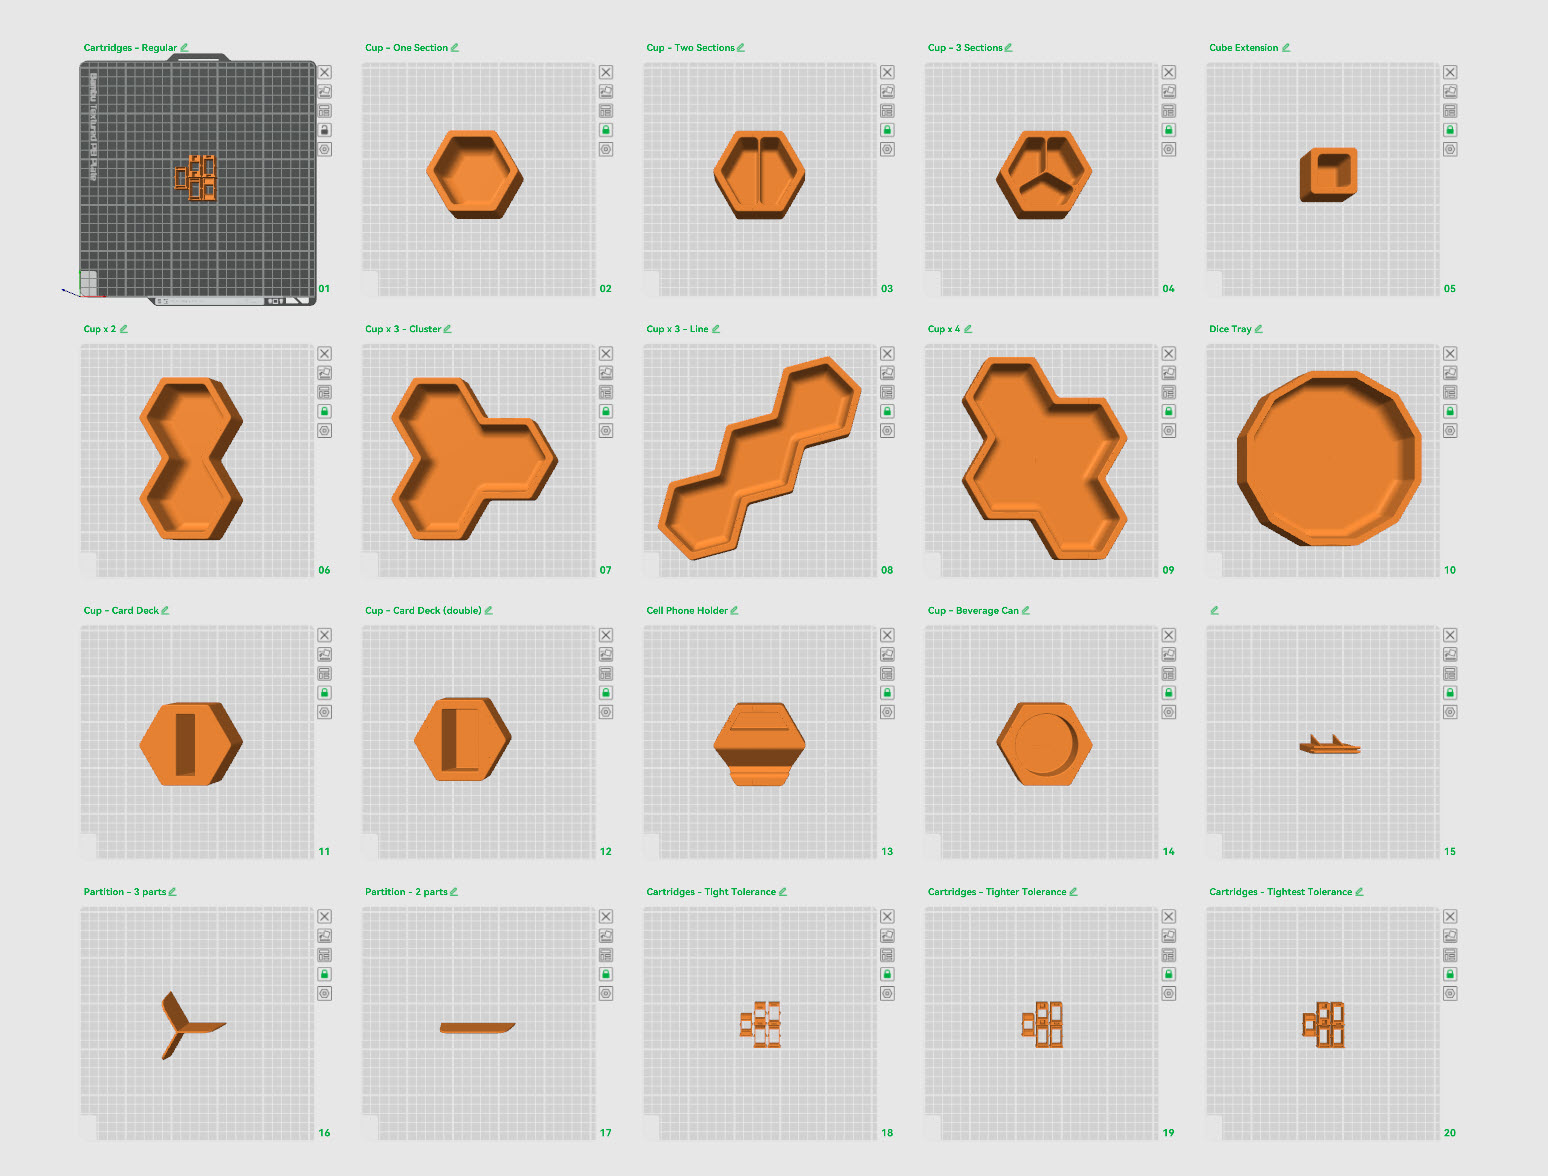
• Standard cup
• Cup with two partitions
• Cup with three partitions
• Double-sized cup
• Triple-sized cup (two formats) *New
• Quadruple-sized cup *New
• Square Module (fits the sides of the cups)
• Card cup (works with standard poker sized and US minis, single and double deck)
• Beverage cup (why not)
• Dice Tray
• Partition add-in for standard cup
• Cartridges to load magnets from the bottom of all cups and trays ( *New variants for tolerances)
• Title Stand *New
• Cell Phone Stand *New
While the trays can be printed and used as-is, a cartridge system is also available, allowing magnets to be loaded from the bottom without glue or special tools. The cartridge system keeps magnets fully hidden , while supporting multiple magnet sizes , giving users flexibility based on availability, size, or price. All trays, cups, and accessories remain fully cross-compatible regardless of the magnet size used .
• 10 × 4 × 2 mm (rectangular)
• 10 × 5 × 2 mm (rectangular)
• 5 × 4 × 2 mm (rectangular)
• 5 × 5 × 5 mm (cube)
• A wider range of magnet options is supported, allowing users to choose based on availability, size, or price.
• Existing and future prints remain fully compatible, regardless of magnet size used.
• There is no preferred or recommended magnet size.
Follow the instructions carefully, as proper magnet alignment remains essential for the system to function correctly.
No supports are required for printing; however, I find it is easier to print the splitters with Brims. The models have been thoroughly tested and can be printed as-is. You can print them at lower quality, up to 0.28 mm draft, though I personally prefer the smoother finish. You can also push print quality further using adaptive layers.
https://makerworld.com/en/@user_2443559174/upload
If you like what you see , there are two ways you can help me make more designs.
An easy way is to boost me through Makerworld. Another way to help out is to (via Ko-Fi).
Boost Me If you print any of these and they work well for you, a boost on MakerWorld is a great way to show it. Boosts earn me points I can put toward filament, materials, and parts, which matters more than it sounds. Every design here went through multiple prints before I was happy with it. Either way, happy printing.
The assembly instructions illustrate the build process using the 10 × 4 × 2 mm cartridge as an example. This is for demonstration purposes only. The same procedure applies when using any of the other supported cartridge variants; simply select the cartridge that matches the magnet size you intend to use.
• Print six cartridges
• Each cartridge uses two magnets: one at the top and one at the bottom. Notice that the bottom of the cartridge has a wider base. For example…
• Load three cartridges with magnets in both slots, making sure they are all aligned with the same polarity (that is, they all attract in the same direction). A simple trick is to keep a stack of magnets already stuck together, then insert each one without changing its orientation.
•
Load three more cartridges with magnets, making sure the magnets are aligned in the opposite direction .
•
At this point, you should have two groups of cartridges loaded with magnets. I like to take a moment to make sure each group is aligned properly.
• Cartridges from the same group should connect in the same direction with any other cartridge from the same group.
• Cartridges from the opposing group should not be able to connect in the same direction.
If they don’t connect with the same alignment from another cartridge in the same group, it means a magnet was misaligned during installation. If that happens, no worries! The slots are intentionally just loose enough to let you remove a magnet if needed. The trick is to use another magnet to pull it out.
•
Now for the fun part! Flip the tray over. You’ll see a series of slots. Take one group of cartridges and insert them into every other slot , leaving one empty slot between each cartridge. For best results, make sure the side with the exposed magnet is facing outward .
Pro tip: I don’t fully push the cartridges in until the very end, just in case. This makes it easy to pull them back out if you think you’ve made a mistake along the way.
•
Fill the remaining slots with the other set of cartridges .
•
You can test everything using spare magnets before finalizing the model. If you followed the steps, everything should work as intended. Push each cartridge in firmly and you’re done.
Warning: once the cartridges are fully seated, you will hear a click. At that point, they are locked in place and are not meant to be removed.
Same principle as the hex-shaped trays, but you will need a total of four cartridges. Each group uses two cartridges instead of three.
Same principle as above, with a few key differences. Due to the size of the dice tray, there is little opportunity to connect anything on the top or bottom. As such, only the sides really matter.
Follow the same approach as with the hex-shaped trays, but you will need a total of 12 cartridges. If you want to save on magnets, I suggest loading only the top slot of each cartridge.
Magnetized Token Tray System with hidden magnets If Ikea made token trays, they would probably look something like this. These trays were designed with both function and style in mind. Yes, the bottoms of each tray are smoothed to make picking up tokens much easier. While the trays can be printed and used as-is, a cartridge system is also available, allowing magnets to be loaded from the bottom without glue or special tools. The cartridge system keeps magnets fully hidden while supporting multiple magnet sizes, giving users flexibility based on availability, size, or price. All trays, cups, and accessories remain fully cross-compatible regardless of the magnet size used. Available parts Standard cup, Cup with two partitions (two styles) , Cup with three partitions (two styles), Double-sized cup, Square Module (fits the sides of the cups), Card cup (works with standard poker sized and US minis), Beverage cup (why not), Dice Tray, Partition add in for standard cup, Cartridges to load magnets form the bottom of all cups and trays.
More by Pmdage