Log in to join the conversation.
Frosthaven insert no lid lift, app users friendly
Please support Velestus by Liking/Boosting their Print on MakerWorld.
This insert was designed using https://github.com/dppdppd/The-Boardgame-Insert-Toolkit
I am playing Frosthaven with my group using dedicated application. I needed insert that will for everything neatly in the box, including map tiles. I hate it when I have lid lift due to placement of elements inside. I wanted fast & easy access to enemy standees and all needed cards. I was frustrated by original idea of having 48 bags for each enemy, thrown loosely inside of box. I needed way of separating those components, possibly speeding up session setup. If you are like me, then this insert is just for you.
In my work I have gained a lot of inspiration from https://makerworld.com/en/models/24444-frosthaven-insert#profileId-136128 .
What exactly this insert features:
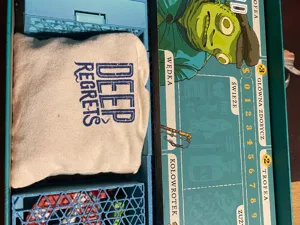
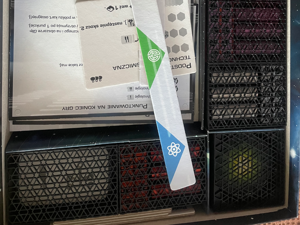
• neat storage of all components without lid lift, when some additional care is paid to laying them in remaining space
• all map tiles fitting into the box
• enemy standees grouped together for easier session setup
• initiative tokens used for labelling of the boxes
• each player gets own character box with already unlocked cards & equipment
• I recommend storing unlocked ability & attack cards in original character box
• I have also hidden health & HP trackers in original character boxes, as I am not using those in my playthroughs
• allows for faster player setup and prevents bulking of original box when trying to fit inside sleeved cards
• most of boxes should fit cards in sleeves, only Items box will not
• I did it on purpose, as I am sleeving only player attack & ability decks
• I recommend sleeving items, if you wish to, only after purchase is made and item is handed over to the player
• separate box for bosses standees
• need some care to fit everything inside, but it is doable
• had to compensate for remaining space in the box and wanted to fit this at the very bottom, next to monster boxes
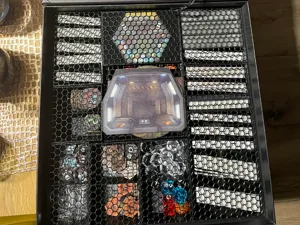
• bottom layer of the insert has components that are used to setup a game
• top layer of the insert consists of cards that are used per each game session
• insert preserves original status & terrain box
• it is not ideal, and finding proper terrain is sometimes difficult, but it neatly fits all those components & its very lightweight
All insert components with assembly instructions:
Bottom layer
• up to 4 character boxes - print only as many as you need for your party
• place on wider side
• I recommend using those printed boxes to separate locked & unlocked characters
• after all printed & original character boxes are placed together, there is remaining space for some of character miniatures
• I recommend placing them so that at the bottom you have characters you are not playing
• 4 character miniatures, with up to two wider boxes, need to be placed separately
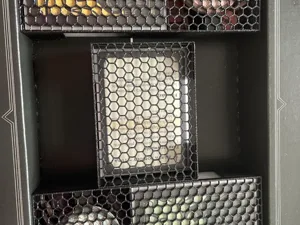
• 16 monster boxes
• I have grouped monsters alphabetically in my assembly, from left to right
• this will make you have 5 columns with 3 rows of boxes & one single box in 6th column
• place boxes so that you can easily read what monsters are put inside
• I have stored there also related monster ability cards
• If I will wish to play without application, it will make it easier to setup a game
• I am aware that for some monsters there are single decks (e.g. Priests), but like I said already, I am playing with application
• 48 monster standee grouping holders, which will be all inside of monster boxes
• 7 holders for 4x monsters
• 31 holders for 6x monsters
• 10 holders for 10x monsters
• boss box, next to single monster box
• enemy stats & original stat sleeves box
• place it on the edge of the box, so it sits between boss box & character mini boxes
• life goals & generate scenario cards, placed next to enemy stats box
• enemy type standees box, place it in 6th monster box column
• remaining space is for 4 character mini boxes, preferably two wider and two thinner, as presented on my photos
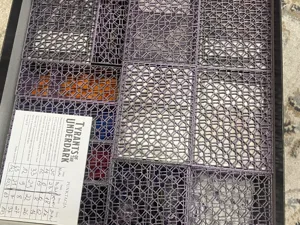
Middle Layer - cards
• inventory
• scenario used small cards
• there is naming on the side of the box to better present what to put where
• if you wish to have it more readable, you can paint it (like I did, what you can see on the photo)
• rest of small cards
• same like above, naming is added to present placement
• I have put locked random scenario cards with schemas
• outpost events
• road events & buildings
• refer to photo how to place all those boxes
• labels on lids are oriented in same way when everything is put correctly in place
• if you have 4 characters in play, place all unlockable letters on top of character boxes, otherwise maybe you can fit them in place of printed character boxes (I haven't tried it)
• top layer of minis I recommend to consist of minis that are currently used by players
• place map tiles in remaining space, try to put as much next to each other as possible
• I don't have strict solution to that, I am doing it by trial and error :)
Top Layer - books, map & original terrain & status box
• refer to photo for storing, but mostly is same as in original insert
Boost Me If you like my work, I will hugely appreciate Boost as it motivates me for further work and more improvements to my designs
 Frosthaven 2022
Match filament
/pic9208779.jpg)
/pic9208777.jpg)
/pic9208778.jpg)
/pic9208776.jpg)
/pic7360390.jpg)
/pic8795706.jpg)
/pic9033723.jpg)
More by Velestus