Log in to join the conversation.
Tidal Blades 2 Insert
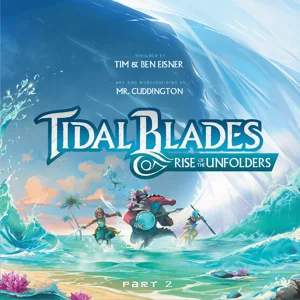
An insert/organizer for the game Tidal Blades 2: Rise of the Unfolders, optimized for fast setup and teardown.
This is a big insert, but absolutely worth it! I played the first couple scenarios while designing it, and the scenarios since have been so much faster and more enjoyable, both to set up and to play. I’ve been very careful in every design detail
- Supports sleeved cards up to 97mm x 67.5mm for full-sized cards, 67mm x 67mm for square cards
- No lid lift
- Supports vertical storage
- Trays nest inside each other to prevent movement
- Hero trays contains everything a player needs (except the hero sheet), just grab yours and you’re practically ready to go
- Two trays are intended to be pulled out and used during gameplay and contain all needed status effects, wound cards, fruit tokens, enemy markers, mutation tokens, etc.
- Scenario tray is organized and easy to see and grab all pieces that might be needed for scenario setup
- Reservoir ability tray makes it easy to see and select abilities
- Sub-trays in hero trays to store markers, items, standees, etc.
- Dividers in hero trays under which can be stored any locked cards until they’re earned
- Space under the hero sub-trays to put permanently removed/lost cards, inactive reservoir abilities, etc.
- Clearly labeled enemy/NPC boxes that fit all relevant cards, standees, and initiative trackers
- Enemy/NPC boxes have a satisfying, durable snap-lock mechanism
- Room for sealed envelopes, health/initiative trackers, and other special cards and boards
- Finger slots, slopes, and clearance for everything, nothing is hard to get out
- Curves, chamfers, and filets everywhere, everything is smooth, comfortable, and high-quality!
These store all the cards, initiative trackers, and standees for the enemies, NPCs, etc. that match the name on each box. The boxes support sleeved cards up to 97mm x 67.5mm, and should fit even thicker matte sleeves, but if you’re concerned about your sleeves you might want to print a box in all white to test the fit.
There's a snap-lock mechanism when it gets all the way in that will keep the lids locked in place, but should still be very easy to slide them off.
If a lid seems to stick or is hard to slide on/off the box, it probably just needs to be broken in. Slide it on/off about a dozen times, that should smooth it out.
No way around it, these are multicolored prints. I suppose if you can’t do multicolor, you could try printing in white and using a sharpie to fill in the letters (which are very slightly embossed), but if you’re going that route, try it on one box first to see if you’re happy with it.
0.4mm nozzle worked fine for me, you could go down to 0.2mm if you’re super concerned about the lettering details but it shouldn’t be necessary (and would use a lot more filament if you’re using an AMS and have to keep purging colors).
Nothing too tricky about them otherwise!
These consist of a large rectangular tray, a smaller nested tray, and a divider (which is optional, but recommended).
A given hero’s standee, plastic stand, health/focus/spirit/goal markers, initiative marker, active reservoir abilities, items, etc. go in the smaller nested tray (note that there are only 4 sets of health/focus/spirit markers, so only 4 heroes will have them). It can be removed and dumped out easily to get whatever you need in the moment, and in fact all of it should be needed every scenario.
There is space under the nested tray for inactive reservoir abilities and any cards that might be permanently lost or unavailable to you.
The other side of the hero tray is intended for your hero’s locked cards with the divider on top of them, and your active deck on top of that divider.
On top of the hero tray is a recess that holds your hero’s goal/path cards.
Printing is very straightforward. The dividers are multicolored, but could still function perfectly in a single color. If you’re concerned about your printer’s precision, you might consider printing them with outer/inner wall order to make sure the nested tray fits perfectly, but there should be plenty of clearance anyway.
This is the one with the L-shaped well and vertical token storage.
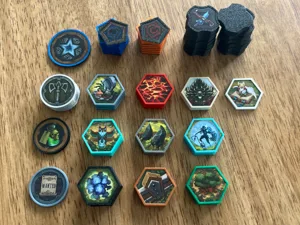
Check the pictures to see which tokens go where. They have been organized to be easy to see and easy to grab, and to make it easier I’d recommend having the lettered tokens sorted A-D front-to-back.
There are some miscellaneous tokens (the tiny bombs, the generic “!" initiative token, a couple one-off tokens, etc.) that go in the wells under the triple-hex overlay tiles.
The reservoir ability tray fits onto the bottom half of the scenario tray. Each slot holds up to 2 reservoir abilities, and conveniently there are 2 copies of each reservoir ability, so the 2 copies get to share a slot. Note the background of each reservoir token, they’re different for the Lvl 2 and Lvl 4 abilities! Use that to quickly know which are which. I recommend putting the Lvl 2 abilities on the left and Lvl 4 on the right, as pictured.
Printing is straightforward, but for the reservoir ability tray I might recommend printing outer/inner wall order and maybe even with a 0.2mm nozzle. It shouldn’t matter much though, and I was fine with 0.4mm nozzle.
One of these holds all the attack dice, standee bases (excluding the ones for the heroes, which are instead in the hero trays), monster health tracker markers, and mutation markers. The other holds each type of status token, fruit tokens, and wound cards. These trays are meant to be out and within reach during gameplay.
Note that these two trays and the scenario/reservoir ability trays stack on top of each other, and they are designed to nest, but the order doesn’t matter. I recommend the scenario/reservoir ability trays go on the bottom, then the status tray, then the battle tray, but that’s just what I do and it doesn’t matter much.
Nothing tricky with printing them, just print them!
The long piece holds the sealed envelopes and one-off large cards on one long side, and the health trackers and round tracker on the other long side. The larger card well is for the shop cards and Archon cards, the smaller well is for battle scars. There’s also a slot for one of the two bags, either the one with shop items or the one with enemy rewards, doesn’t really matter which. I prefer the enemy rewards because, I don’t know, vibes?
The other remaining piece holds the remaining regular-sized cards, and there’s a little shelf that acts as a spacer and a place to put the other of the two bags. I put the shop bag there, but if you want to put the enemy rewards bag there instead, go for it! Express that individuality!
Nothing tricky with printing them, either! If your printer isn't big enough to print the long piece, you'll have to cut it somewhere, but I'm not sure I have a good solution for you. Most printers should be able to print it diagonally though.
There’s one last piece that’s a long, skinny rectangle. Its purpose is simply to fill a gap that otherwise might have tokens falling out when stored vertically. If you don’t plan on storing vertically, you don’t need to print it.
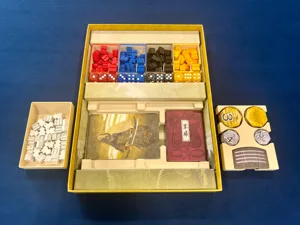
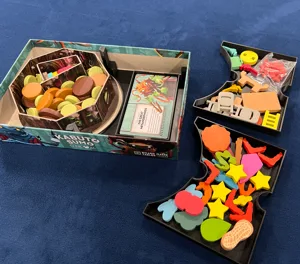
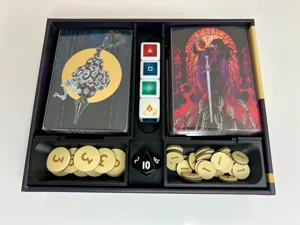
The photos should make it clear how everything fits together, and it’s difficult to get wrong. But here’s the breakdown!
The long, big piece goes on one end of the box, the only way it would make sense to fit. Enemy boxes go on one side of it, and since the label is on both ends it doesn’t matter which side is up. Hero boxes are stacked side-by-side, 3-wide and 2-deep (I recommend your active heroes being on the top layer of course). The last card holder fills in the remaining space beside them.
Then the scenario/reservoir ability tray, battle tray, and status tray stack on top of each other in any order. I recommend the scenario tray on bottom because it’s not needed during gameplay and often doesn’t need to be completely pulled out of the box during setup. But they’re built to nest in any order you want.
The side player boards fit right on top of the hero trays, and then the player grids fit on top of those and across the other trays. The spacer (if you printed it) covers the gap to the side of the grid boards to make sure no tokens fall out if the game is stored vertically.
The smaller map book, scenario book, and map spacer fit next, then the other map books and rulebook. The hero sheets can fit anywhere between any of those, I personally put them just under the rulebook.
For the spiral-bound books, you might want to alternate them so the spirals are on opposite sides, otherwise they might interfere with each other. But there’s intentionally space for the spiral bindings anyway.
And that’s it! Throw the lid on there, admire the lack of lid lift and bask in the satisfaction of an organized game, then immediately take the lid back off and start playing!
Let me know if you have questions or issues of course!
/pic8625750.jpg)