Log in to join the conversation.
Wyrmspan Weighted Coins
Please support Todd Stansell by Liking/Boosting their Print on Printables.
I've had a couple of folks show some makes using the 2 cent euro where they had to scale the model a bit to get it working. I've updated my model to allow me to more easily add different coin sizes (it was already parametric, but the logic wasn't great before). The model now specifically calculates heights based on the expected layer height of 0.15mm (with 0.20mm first layer).
I now have a model that is designed specifically for the 2 cent euro. This coin is slightly thicker than a US penny and as such requires an extra printed layer, so the overall dimension of the print is 3.2mm instead of 3.05mm for the US penny version. It's also smaller in diameter, so the hole is slightly smaller to maintain a nice tight fit. Here's a table showing all of the dimensions:
Coin Diameter Height Hole Diameter Hole Height Total Height
US Penny 19.05mm 1.52mm 19.10mm 1.65mm (11 layers) 3.05mm
2 Cent Euro 18.75mm 1.67mm 18.80mm 1.80mm (12 layers) 3.20mm
Because of the difference in layers, the pause to insert the coin is at a different spot, so I've split the models into two .3mf files with the pause at the appropriate spot.
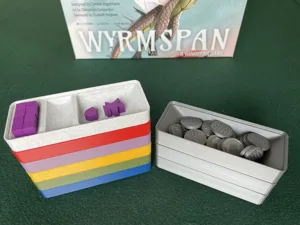
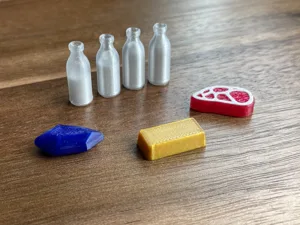
I wanted some upgraded coins after making my own upgraded resources . The coins included in the official Wyrmspan upgrade pack are pretty nice because they're made out of metal. I designed this model to embed a penny into each one during printing so they have some weight to them and feel nicer in the hand.
• I've included solid models if weight doesn't matter to you and you just want to print some nicer coins to replace the cardboard ones.
• There are models with smooth sides (like pennies and nickles).
• There are models with ridges on the sides (like dimes, quarters, etc) as seen in my photos.
• The ridges hide seams a little better and give it a nice texture.
• The smooth ones have a pretty clean look.
• The slot for the coin is designed for a US penny and is 19.10mm diameter and 1.60mm thick. If you're outside the US and need a different size slot let me know and I can try to make a different size.
Fun trivia – the ridges were originally developed to deter folks from nipping away parts of a coin to “steal” it, so are generally only found on coins with higher value. Remove 1/20th of a coin 20 times and you end up with 21 coins worth of metal (assuming folks don't notice the coins are now short).
I've included my .3mf for PrusaSlicer that includes all the settings I'll mention here, for convenience. The game comes with 45 coins, so I printed 3 batches of 16.
• The MK4 has a firmware limitation where you can only cancel an object if it's one of the first 16 so I stuck with that in case anything went bad…
• I used Overture Space Gray PETG which has a nice pewter-like look to it.
• Clean each penny (or get new ones like I did).
• You want some sort of glue on the bottom so the bottom printed layers stick to the penny instead of being free to flex. It gives the coin a solid feel. I used a drop of super glue.
• You need something sticky on top so when the print resumes, the filament sticks to the penny and doesn't slide/gum up the print. I spread a thin layer of glue stick before putting the penny in.
• I happened to get a couple rolls of pennies and they were brand new, mint condition. They measure ~1.53mm thick (slight variations) and 19.05mm in diameter. The slot for the penny is 19.10mm in diameter and 1.60mm thick. PrusaSlicer slices it in 11 layers, so it ends up 1.65mm. This should accommodate any coins, but if you have really old ones you should measure. I have no idea if old coins used to be thicker or not (the few older ones I had were all thinner at 1.35-1.50mm). Not sure if thin ones would work.
• The pennies should fit tight when you insert them. Make sure to push down hard so they are fully seated! You don't want the print head hitting the penny when you resume your print. Also, careful not to shift the print bed!
I've updated my design to be a little easier to print. The inside of the wing now prints as a different layer than outside so it reflects light differently and stands out better. Also, the scales side prints entirely as the first layer which leaves less smaller gaps. I think it looks nicer this way, plus it reduces the print time a bit.
• Use the standard 0.20mm first layer.
• Use a 0.15mm layer height.
• Add print pause at 2.45mm layer.
• If you use a 0.4mm nozzle, I got the best results using:
• non-IS MK4 profile. I didn't get good results with IS enabled.
• 0.15mm QUALITY print settings
• adjusting the max volumetric speed to 2 mm³/s so the max speed doesn't go above about 40mm/s. It only prints 3 flat layers above the penny so each layer needs to print very cleanly. Any defects show through.
• If you use a 0.25mm nozzle, I found this worked best:
• Input Shaper enabled saves some time and doesn't seem to hurt
• 0.15mm STRUCTURAL print settings
My original design included the following instructions for printing:
• Set first layer to 0.10mm – this lets the outer ring print first so you get a clean border.
• Use a 0.15mm layer height (0.10 also works fine, but just takes longer)
• I used the STRUCTURAL profile. You want at least the bridge layer when it covers the penny to go nice and slow.
• I've printed with 0.25mm and 0.4mm nozzles and both come out fine, but the 0.25mm just has somewhat smoother/cleaner lines.
• Add a print pause at 2.50mm to let you add the pennies.
If you like my models and want to make my day , you can buy me a ☕ !