Log in to join the conversation.
Carcassonne Magnetic Tile Grid and Box Organizer
I tried out a few of the other existing printable Carcassonne grids, and most of them worked great. But I wanted a version that would fit inside the game box. So I designed my own grid from scratch (though it's definitely inspired by some of the other designs ).
One of the first things I realized was that the interlocking “puzzle-piece” style grids weren't going to work—because there just isn't enough side-to-side room in the game box for even tiny interlocking tabs on the side of a 4x4 tile grid. So I ordered some of the smallest neodymium disc magnets I could find (1mm x 2mm), and adjusted the design to accommodate gluing them in. I still wish I could have made it work without needing magnets—I tend to love fully-printable solutions to things—but in this case, I think it turned out to be worth the extra time/money to glue in the magnets
The end result is great! Each grid has perfectly-sized openings for the tiles. They're not too snug, but they also don't wiggle around too much. The magnets are just strong enough to keep the grid sections together nicely, without needing much effort to attach/detach them.
To top it off… I created an easy-in/easy-out “stand/holder" that goes inside the game box (inspired by this model ) which holds the grid pieces in a neat stack, and makes sure there's room for the rest of the game pieces. I then created a few other little containers to store the game tiles and each of the sets of Meeples individually.
I also made it so that (if you want to) you can remove two halves of the box organization system, and have them out on the table during gameplay. Each half shares the same magnetic attachment pattern as the grids themselves—so you can have the “stock pile” of the game tiles attached to one side of the grid… and the stack of spare grids attached to another side of the play area. Or, of course—you can just leave it all inside the box. My main goal was to make it even easier to quickly set up the game and start playing… and make it easy and quick to put things away when you're done!
Everything you see in my pictures was printed on my Prusa MK4 printer, using the default “InputShaper” 0.2mm speed profile, on the Smooth Steel PEI sheet, with no brim or supports or anything.
- I printed my grids using Prusament “Simply Green” PLA
- each grid section took about 1 hour 20 minutes to print
- I printed the box organizers using Prusament “Galaxy Black” PLA
- the large flat box insert section (with the grid holder tower) took about 3 hours
- the game tile holder + all 5 meeple storage boxes took about 4.5 hours
So in total, creating 12 grid sections + both halves of the box insert + 5 meeple storage boxes… this took around ~24 hours of print time total on my MK4. Depending on your printer & settings, your times will obviously vary.
For the magnets, I ordered a set of 2mm x 1mm Neodymium disc magnets from amazon (not an affiliate link or anything—feel free to buy them from wherever you can find them). For the complete set, you will need at least 120 magnets. Or, for the grids alone—if you don't care about magnets for the box organizers—you'd only need 96 (8 magnets x 12 grids). That sounds like a lot—but the set I bought for $13 USD came with 500 magnets.
I also used common super glue to fix all of the magnets into their designated recesses.
I highly recommend printing the “Carcassonne Test Grid” file first, and adding the magnets in, and checking their fit… to verify that the materials and print settings you plan to use will actually work well, and that there won't be any issues getting the magnets in place.
You will also need to be VERY sure that your print bed is level and clean , so that edges don't peel up and come un-stuck while you print. I didn't end up having to use a brim or anything… but my printer is also brand new. You can definitely add a brim if that helps, though. In fact, if you set it to use a brim on the internal edges only , you wouldn't even really need to remove them afterward, as they wouldn't interfere with the grids connecting together.
Once you're sure you've got good settings, go ahead and print 12 grids.
Then print 5 copies of the Meeple box, 1 tile organizer, and 1 box insert.
I personally waited to glue the magnets until after I had printed all 12 of the grids… since setting up & cleaning up the glue felt easier that way.
Doing it that way also helped me keep this next part straight:
— THIS IS SUPER IMPORTANT! Make sure you've thought this through! —
In order for the grid sections to fit together correctly, you'll have to make sure you use a CONSISTENT pattern for the polarity of the magnets when inserting them into the slots on every grid. Otherwise you'll end up with grids that will repel each other instead of connecting together!
My system was to look at each edge of the grid, and insert the magnet in the left slot so that it had a “negative” attraction, and then insert the right-side magnet so it had a “positive” attraction. Then, rotating the grid 90 degrees at a time, I'd repeat that same pattern on all 4 edges of the grid—left negative, right positive. Then I did that same thing on all 12 grids.
I kept my first grid with already-glued-magnets nearby while doing each of the rest… in case I got lost in the process, and needed a reference/tester to make sure I was getting the polarity correct on the rest.
The best way I found to insert the magnets (and keep track of polarity) was to make a “pencil-like” stack of about 20-30 magnets at a time, and use that as a “stick” to get leverage and control while inserting the magnets. They're just too tiny and hard to manage individually otherwise.
I used a system like this:
- I squeezed some super glue into a pile on a disposable paper plate
- I picked up a “stick” of 20-30 magnets
- I checked the polarity of the stick/stack against my “reference grid”, to find the correct end I needed to insert into the next slot on the new grid.
- I then “dipped” that end of the magnet stack into the glue, (just barely), to get a little bit of glue on just the end magnet only
- then I aligned that gluey magnet with the slot on the grid, and pushed it in.
- once the magnet was inserted into the slot, I would sorta “drag” the rest of the magnet stack to one side while still pushing down (rather than pulling the extra magnets directly away from the grid, and probably pulling the seated magnet with it), until the stack was disconnected from the lone inserted magnet.
- next, I would flip the stack of magnets around (so the OTHER polarity was now facing the grid), and set it down on the table.
- If needed, I then used a flat edge of one of the Meeples to push the magnet further in place, until it was as flush as possible with the top of the hole.
- Then I'd pick up the stack of magnets… double-check the polarity needed for the next slot on the grid (it should repel the magnet I just inserted), and repeat the process.
Once you get into the rhythm of it, it goes pretty quick, and you can get them all glued in no time.
I also added magnets to the bottom of the Meeple boxes (and the matching top area of the box inserts) … just to give it a nice “snap in place” feel when adding/removing them from the game box. That's not strictly necessary, so feel free to skip those if you'd like. But there are also spots for magnets on the sides of both box inserts, so that they snap together while in the box … or snap to the sides of the grids if you take them out during gameplay.
 Carcassonne 2000
Layer by Layer
Carcassonne 2000
Layer by Layer
Cover Colors
/pic9545952.jpg) Carcassonne: The Four Seasons – The Winter 2026
Carcassonne: The Four Seasons – The Winter 2026
/pic8795628.png) Carcassonne: 4 Seasons – The Summer 2025
Carcassonne: 4 Seasons – The Summer 2025
/pic9251114.png) Carcassonne: Bonusplättchen Spiel 2025 2025
Carcassonne: Bonusplättchen Spiel 2025 2025
/pic9210979.jpg) Carcassonne: Castles & Bridges 2025
Carcassonne: Castles & Bridges 2025
/pic9210977.jpg) Carcassonne: Jousts & Crests 2025
Carcassonne: Jousts & Crests 2025
Show 100 more
/pic9210967.jpg) Carcassonne: Messengers & Mayors 2025
Carcassonne: Messengers & Mayors 2025
/pic9210978.jpg) Carcassonne: Siege & Defense 2025
Carcassonne: Siege & Defense 2025
/pic9253207.png) Carcassonne: The Wonders of Humanity Set III 2025
Carcassonne: The Wonders of Humanity Set III 2025
/pic8922549.png) The Black Rider 2025
The Black Rider 2025
/pic9206162.jpg) The Journey to Carcassonne 2025
The Journey to Carcassonne 2025
 Carcassonne: 4 Seasons – The Autumn 2024
 Carcassonne: 4 Seasons – The Spring 2024
/pic8679095.jpg) Carcassonne: Medina Azahara 2024
Carcassonne: Medina Azahara 2024
/pic8189422.jpg) Carcassonne: Snakes and Ladders 2024
Carcassonne: Snakes and Ladders 2024
 Carcassonne: The Wonders of Humanity Set II 2024
/pic7521564.jpg) Carcassonne Maps: Nordics 2023
Carcassonne Maps: Nordics 2023
/pic7715493.jpg) Carcassonne: 3D Starting Landscape 2023
Carcassonne: 3D Starting Landscape 2023
 Carcassonne: Mini-Bundle I 2023
/pic7869094.jpg) Carcassonne: The Drawbridges 2023
Carcassonne: The Drawbridges 2023
 Carcassonne: The Wonders of Humanity 2023
/pic7732465.jpg) Mists over Carcassonne: The Spell Circles 2023
Mists over Carcassonne: The Spell Circles 2023
/pic7115984.png) Carcassonne Maps: Ukraine 2022
Carcassonne Maps: Ukraine 2022
/pic7808290.jpg) Carcassonne: The Bets 2022
Carcassonne: The Bets 2022
 Carcassonne Maps: Taiwan 2021
 Carcassonne: The Gifts 2021
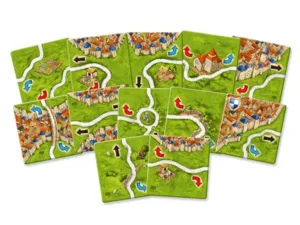 Carcassonne: The Signposts 2021
/pic5726882.jpg) Carcassonne Maps: USA East 2020
Carcassonne Maps: USA East 2020
/pic5726883.jpg) Carcassonne Maps: USA West 2020
Carcassonne Maps: USA West 2020
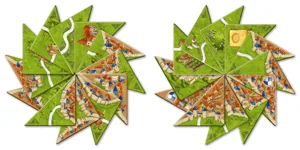 Carcassonne: Halb so Wild 2020
/pic5384724.png) Carcassonne: The Land Surveyors 2020
Carcassonne: The Land Surveyors 2020
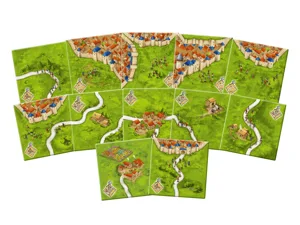 Carcassonne: The Peasant Revolts 2020
/pic4995682.jpg) Carcassonne Maps: Benelux 2019
Carcassonne Maps: Benelux 2019
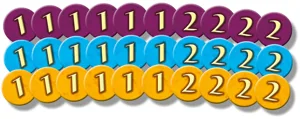 Carcassonne Maps: Chips 2019
/pic4666741.jpg) Carcassonne Maps: Deutschland 2019
Carcassonne Maps: Deutschland 2019
 Carcassonne Maps: France 2019
 Carcassonne Maps: Great Britain 2019
/pic4995690.jpg) Carcassonne Maps: Península Ibérica 2019
Carcassonne Maps: Península Ibérica 2019
/pic4995704.jpg) Carcassonne: The Tollkeepers 2019
Carcassonne: The Tollkeepers 2019
 Carcassonne: Bonusplättchen Spiel 2018 2018
 Carcassonne: Spiel Doch Mini Expansion 2018
/pic4348023.png) Carcassonne: The Barber-Surgeons 2018
Carcassonne: The Barber-Surgeons 2018
 Carcassonne: The Fruit-Bearing Trees 2018
/pic9210981.jpg) Carcassonne: Circus & Artists 2017
Carcassonne: Circus & Artists 2017
/pic2939771.jpg) Carcassonne: Das Labyrinth 2016
Carcassonne: Das Labyrinth 2016
/pic3043135.jpg) Carcassonne: Die Wahrsagerin 2016
Carcassonne: Die Wahrsagerin 2016
/pic3300631.jpg) Carcassonne: Nikolaus-Zählleiste 2016
Carcassonne: Nikolaus-Zählleiste 2016
 Carcassonne: The Watchtowers 2016
/pic3302938.jpg) Каркассон: Соловей-Разбойник и Водяной (Carcassonne: Nightingale the Robber and the Water Spirit) 2016
Каркассон: Соловей-Разбойник и Водяной (Carcassonne: Nightingale the Robber and the Water Spirit) 2016
/pic2478133.jpg) Carcassonne: Castles in Germany 2015
Carcassonne: Castles in Germany 2015
/pic9240827.png) Carcassonne: Starttableau 2015
Carcassonne: Starttableau 2015
/pic2586701.jpg) Carcassonne: The City Gates 2015
Carcassonne: The City Gates 2015
/pic3781348.jpg) Carcassonne: CutCassonne 2014
Carcassonne: CutCassonne 2014
/pic2708552.png) Carcassonne: Easter in Carcassonne 2014
Carcassonne: Easter in Carcassonne 2014
 Carcassonne: Halb so wild I 2014
 Carcassonne: Halb so wild II 2014
 Carcassonne: Sheep & Shepherds 2014
/pic9163868.png) Carcassonne: The Abbot 2014
Carcassonne: The Abbot 2014
/pic3227621.jpg) Каркассон: Наука и магия 2014
Каркассон: Наука и магия 2014
/pic2353063.jpg) Carcassonne: Die Belagerer 2013
Carcassonne: Die Belagerer 2013
/pic7152379.jpg) Carcassonne: Karácsonyi ajándék 2013
Carcassonne: Karácsonyi ajándék 2013
 Carcassonne: Corn Circles II 2012
/pic1441224.jpg) Carcassonne: Die Windrosen 2012
Carcassonne: Die Windrosen 2012
/pic1443354.jpg) Carcassonne: Little Buildings 2012
Carcassonne: Little Buildings 2012
 Carcassonne: Mage & Witch 2012
 Carcassonne: The Ferries 2012
/pic1949624.jpg) Carcassonne: The Flying Machines 2012
Carcassonne: The Flying Machines 2012
 Carcassonne: The Gold Mines 2012
/pic1949628.jpg) Carcassonne: The Messengers 2012
Carcassonne: The Messengers 2012
 Carcassonne: The Robbers 2012
/pic5643768.png) Die Bettler (fan-erweiterung für Carcassonne) 2012
Die Bettler (fan-erweiterung für Carcassonne) 2012
/pic6215336.jpg) Die Wälder von Carcassonne V2 (fan-erweiterung für Carcassonne) 2012
Die Wälder von Carcassonne V2 (fan-erweiterung für Carcassonne) 2012
/pic5624269.png) Weg durch die Stadt (fan-erweiterung für Carcassonne) 2012
Weg durch die Stadt (fan-erweiterung für Carcassonne) 2012
/pic2034335.jpg) Каркассон: Дворяне и Башни 2012
Каркассон: Дворяне и Башни 2012
/pic2519633.jpg) Каркассон: тайл Избушка 2012
Каркассон: тайл Избушка 2012
 Carcassonne: The Festival 2011
/pic1013538.png) Carcassonne: The Phantom 2011
Carcassonne: The Phantom 2011
 Carcassonne: The School 2011
/pic2034337.jpg) Каркассон: Предместья и обитатели 2011
Каркассон: Предместья и обитатели 2011
 Carcassonne: Die Kornkreise 2010
 Carcassonne: Expansion 8 – Bridges, Castles and Bazaars 2010
 Carcassonne: La Porxada 2010
 Carcassonne: The Plague 2010
/pic595711.jpg) Carcassonne: Der Tunnel 2009
Carcassonne: Der Tunnel 2009
/pic471370.jpg) Carcassonne: Catapult 2008
Carcassonne: Catapult 2008
 Carcassonne: Cult, Siege & Creativity 2008
/pic1726382.jpg) Carcassonne: The Cult 2008
Carcassonne: The Cult 2008
/pic6063458.jpg) Spielbox-Almanach 25 Jahre Hans im Glück Beilage 2008
Spielbox-Almanach 25 Jahre Hans im Glück Beilage 2008
/pic3513934.jpg) Carcassonne: Abbey & Mayor 2007
Carcassonne: Abbey & Mayor 2007
/pic4007858.jpg) Carcassonne: Expansion 6 – Count, King & Robber 2007
Carcassonne: Expansion 6 – Count, King & Robber 2007
/pic134810.jpg) Carcassonne: Kreivi ja Kuningas 2006
Carcassonne: Kreivi ja Kuningas 2006
/pic9210966.jpg) Carcassonne: Towers & Thieves 2006
Carcassonne: Towers & Thieves 2006
/pic5643734.jpg) Truppenaufmarsch (fan-erweiterung für Carcassonne) 2006
Truppenaufmarsch (fan-erweiterung für Carcassonne) 2006
 Carcassonne: Dragon & Fairy 2005
 Carcassonne: The River II 2005
/pic6065769.jpg) Holzfäller & Müller (fan-erweiterung für Carcassonne) 2005
Holzfäller & Müller (fan-erweiterung für Carcassonne) 2005
/pic56574.jpg) Carcassonne: Die Katharer 2004
Carcassonne: Die Katharer 2004
/pic137042.jpg) Carcassonne: The Count of Carcassonne 2004
Carcassonne: The Count of Carcassonne 2004
/pic5625568.jpg) Fischerhütte (fan-erweiterung für Carcassonne) 2004
Fischerhütte (fan-erweiterung für Carcassonne) 2004
 Carcassonne: King & Scout 2003
/pic9210963.jpg) Carcassonne: Traders & Builders 2003
Carcassonne: Traders & Builders 2003
/pic6073479.jpg) Wald (fan-erweiterung für Carcassonne) 2003
Wald (fan-erweiterung für Carcassonne) 2003
/pic9210962.jpg) Carcassonne: Inns & Cathedrals 2002
Carcassonne: Inns & Cathedrals 2002
/pic193765.jpg) Carcassonne: The River 2001
Carcassonne: The River 2001
/pic5975267.jpg) Landschaftskarten die Dritte (fan-erweiterung für Carcassonne)
Landschaftskarten die Dritte (fan-erweiterung für Carcassonne)
/pic6204672.jpg) Nochmal neue Landschaftskarten (fan-erweiterung für Carcassonne)
Nochmal neue Landschaftskarten (fan-erweiterung für Carcassonne)