Table Talk
Nothing here yet. Love this design? Say so - the designer might see it.
Log in to join the conversation.
Magnetic Peptide Vial Vault (4x 3ml or 4ml vials!)
Storage & Containers
Free
Plan Your Print
Sign in
to track this print from Want to Printed.
About 95 g of filament
From the designer's print profile
Print Profile (3) 4ML Vial Version 2h 45m 95 g PLA
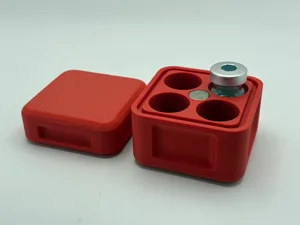
4ML Vial Version
1 plate
2h 45m
95 g PLA
X1 Carbon, P2S, H2D, P1S, X1E, A1, A1 mini, P1P, X1, H2S, H2C, H2D Pro, X2D, A2L
This version is intended to hold 4x 4ml vials!
This print profile was centered around providing some insulation to the peptides stored inside the box; if you're peptides aren't temperature sensitive this has no adverse effects.
To achieve this we have a 5 layer top and 5 layer bottom;
4 layers of wall loops,
and 15% infill so that there's an air gap around each of the vials.
We print at .20 layer height simply as a default but it helps the beveled edges as well!
Plate Details (1)
0.4 mm nozzle, all plates

Plate 1
2h 45m
95 g
PLA · 95 g
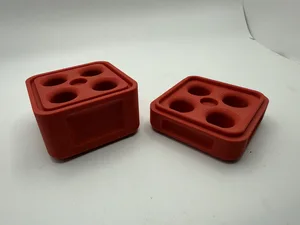
3ML Vial Version
1 plate
2h 39m
92 g PLA
X1 Carbon, P2S, H2D, P1S, X1E, A1, A1 mini, P1P, X1, H2S, H2C, H2D Pro, X2D, A2L
This version is to hold 4x 3ml vials!
This print profile was centered around providing some insulation to the peptides stored inside the box; if you're peptides aren't temperature sensitive this has no adverse effects.
To achieve this we have a 5 layer top and 5 layer bottom;
4 layers of wall loops,
and 15% infill so that there's an air gap around each of the vials.
We print at .20 layer height simply as a default but it helps the beveled edges as well!
Plate Details (1)
0.4 mm nozzle, all plates

Plate 1
2h 39m
92 g
PLA · 92 g
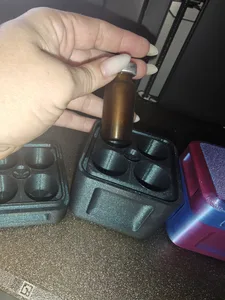
10mL vial size, 47mm height holder
1 plate
3h 12m
111 g PLA
X1 Carbon, A1, P1S, P2S, H2D Pro, X1E, X2D, X1, H2C, A1 mini, A2L, P1P, H2S, H2D
I love these boxes that Prophet made, and have been using the 3ml one for a while now. I had an individual vial holder I printed (but wasn't a huge fan of) for my NAD+ which is in a 10ml vial, and was disappointed that he didn't have more styles for different vial sizes. Saw the 4ml profile here, and figured out that the diameter was the same as my 10ml vial, all I needed was some extra height, so that adjustment was made to fit the taller 10ml NAD+ vials. The full bottom height is 47mm, lid still original height, and the same magnets as the 3mL and 4mL work.
Yeah it'd be an easy adjustment to make in bambulabs, but figured since I did the work for you, may as well post it and help out. Enjoy!
Please give some love to the original model!
Plate Details (1)
0.4 mm nozzle, all plates
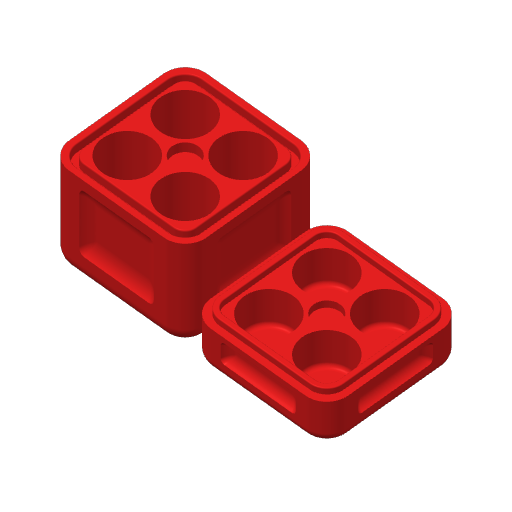
Plate 1
3h 12m
111 g
PLA · 111 g
As sliced by the designer. Your printer, filament, and settings may change these numbers.
Designer's Description
LOOKING FOR A 10x 3ml CONTAINER? We have a new one available here!
https://makerworld.com/en/models/2576329-magnetic-peptide-vial-vault-10x-3ml-vials#profileId-2840969
Perfect for “lyophilized” peptides that are typically purchased in a kit!
I designed this container because I wanted a better way to store my compounded medication in the fridge. I was tired of worrying about expensive vials tipping over or leaking, and I also wanted something discreet to keep my medical routine private from "nosy neighbors" (or family members) looking in the fridge.
This box keeps everything organized, upright, and protected from light.
Key Features:
- Perfect Fit: Designed specifically for standard 22mm diameter vials (fits most compounded Tirzepatide/Semaglutide vials).
- Magnetic Closure: Uses a 12x3mm magnet on both the lid and base. This keeps the lid securely closed and makes alignment automatic—it just snaps into place.
- Insulation: I designed this with thick walls. If you print with lower infill (10-15% gyroid), the air gaps act as insulation to help keep the temperature stable when the fridge door is open.
- Stealth & Safety: Keeps vials from rolling around or breaking, and blocks light which can degrade peptides.
Bill of Materials (BOM):
- 2x Round Magnets (12mm x 3mm) - super glue them in place (make sure to check polarity before gluing!).
Print Settings:
- Material: PLA or PETG works great.
- Infill: I used lower infill to maximize the air gap for insulation.
- Supports: None needed.