Log in to join the conversation.
Gamebound Collection for Apples to Apples
See my other Gamebound Collection Storage Books here .
Note before download: The original boardgame and additional hardware is required .
I will likely be modifying this file with new spines and top covers when testing shows that it can adapt other card games.
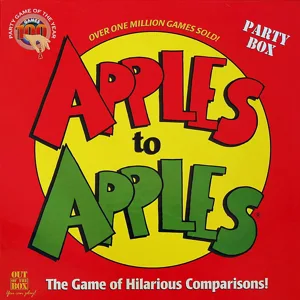
This is a replacement storage box for Apples to Apples. It's part of my Gamebound Collection — a series of book-styled game storage boxes designed to actually look like a matched set when they're lined up on a shelf.
Please consider supporting me to further my 3D printing goals.
Most book-style game storage systems size each box to the bare minimum needed for that game's pieces. That keeps individual boxes compact, but it also means a shelf of them ends up looking mismatched — every box a slightly different height and depth.
The Gamebound Collection keeps height and depth consistent across the whole series (width varies by game), so they read as a matched set rather than a pile of random boxes. That consistency started as a request from my wife, and it's become the core design goal for every box in the line since. The Apples to Apples and Catan boxes, for example, are noticeably thicker than the Playing Card box — but they all share the same spine height and depth.
Alongside that, I've aimed to maximize space savings while keeping everything printable on some of the more common buildplates.
I'm still refining how to store the game's instruction booklets — right now, fitting them into the box can shift the other pieces out of place, so I'd recommend storing instructions separately for the time being. I'm actively working on a fix.
This design is currently available as a multicolor-filament model. If you're on a single-color printer, you can remove the embossed text — the box should bridge cleanly enough without supports once it's gone. A single-color-friendly version with glue-in letters is planned for a future update.
- Minimum 250 × 250mm buildplate (this is sized for a BambuLab P1/X1 buildplate)
- Multicolor capability for the current version.
- You can choose to delete the individual letters from the .3mf file and have the printer simply bridge across where the letters would go. With a good temperature calibration, most printers can achieve these short bridges.
PLA. Please don't substitute PETG — it shrinks too much for some parts to fit together cleanly.
These panels are large, wide, and thin — exactly the shape that likes to warp. Clean your buildplate well, turn off auxiliary fans if your printer has them, and make sure your filament flow and temperature calibration are dialed in ( OrcaSlicer 's built-in calibration prints are a good way to check this if you're not sure).
Setting
Value
Walls
2
Infill
15%
Top Layers
4
Bottom Layers
4
Prime Tower
Enabled
Supports
Disabled
Brim
3mm or more for cover pieces and spine.
Arachne/Print Thin Walls
Enabled
- (8) M3 x 20mm (or longer) Machine Screws (Socket or Panhead)
- (52) 6x2mm Cylindrical Magnets
- I have tested this with 4 magnets holding in each of the card holders. This gives a very strong hold. I suspect you can make this work with only two magnets used per card holder.
- Superglue
- Allen (hex) key sized for the M3 screws — a beveled key makes the center-hinge screws much easier to reach
- Deburring tool (strongly recommended for brim cleanup)
- 1× Top cover
- 1× Bottom cover
- 1× Spine
- 1× Book-box
- 6×Card Holders
- Lay out the front cover, spine, and back cover, aligning the hinges — they should fit snugly.
- Screw the M3×20 screws into the hinges. A beveled Allen key makes the center-hinge holes much easier to reach.
- Press the 6×2mm magnets into the main box piece. Most will be a snug press-fit — but tolerances are slightly loose on purpose in case your printer is not perfectly calibrated. Test each one by trying to pull it back out with another magnet, and add a dot of superglue if it comes loose.
- Double-check polarity before you commit. I'd recommend using one polarity-insertion tool for all the box magnets and the opposite for all the insert-piece magnets, so you don't have to think about it part by part.
- Press the 6×2mm magnets into the card holders, making sure their polarity opposes the box magnets. One trick: seat a magnet in the piece, place a second magnet against it, then press the insert down into the box — the second magnet helps pull the first into correct polarity and alignment.
- Insert the 6×2mm magnets into the top cover, using the same press-fit-and-test method as above.
- Glue the box piece to the back cover.
I'm not affiliated with Apples to Apples, Out of the Box Publish Inc, or Mattel in any way. This is an unofficial, third-party accessory designed to store the original game's pieces — it does not replace and is not a substitute for the official game or its components.
Remixes and commercial resale of this Gamebound Collection design are not permitted.
/pic3223677.jpg)
/pic133232.jpg)

/pic72601.jpg)
/pic72599.jpg)
/pic72597.jpg)
/pic72595.jpg)