Table Talk
Nothing here yet. Love this design? Say so - the designer might see it.
Log in to join the conversation.
Dorfromantik Sakura Flags (Banners) - Single Color or Multi Color
Scoring & Tracking
Free
Plan Your Print
Sign in
to track this print from Want to Printed.
✓ Optional multicolor profile
The designer also offers a multicolor way to print this (an MMU/AMS profile or per-color parts)
Designer's Description
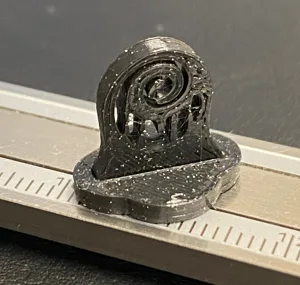
These banners are based on a design by GWGumby , but decorated, and improved for multi-color printing.
The most noticeable changes are the thinner banner, and the border around the banner. You can choose to print the border in a different color, or as a simple groove, or leave it filled in (invisible) if you don't like it.
Printing Instructions
Print all parts in the default orientation. For the whole campaign you will need 3 flags of each color and 1 three-colored flag (sorry for the minor spoiler).
There three ways to color the models:
- Pre-colored:
- Use the pre-colored .3mf file for Bambu Studio (easiest)
- Manual:
- Load one of the files that have "multipart" in the file name
- Then right click the object, and select "Split" and then "Split to parts".
- Go to the "Objects" tab and assign colors to the individual parts
- Paint tool (NOT RECOMMENDED!)
- You can use the paint bucket tool in OrcaSlicer or Bambu Studio to color the parts.
- This will cause strange artifacts inside the flagpole, at least in Bambu Studio.
- Don't do this.
Assembly Instructions
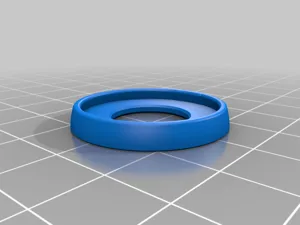
- Place the base on the table

- Hold the flag lightly in the hole in the base (in the correct orientation)
- Give the flag a light tap with a small hammer or some other light object, like piece of wood
- The flag should click into place and hold firmly. No glue necessary.
- If the flag does not go in after a few light taps, try printing the base 1-2 percent larger.
Also available on Thingiverse: https://www.thingiverse.com/thing:6920295
 Dorfromantik: Sakura 2024
Layer by Layer
Dorfromantik: Sakura 2024
Layer by Layer
Cover Colors
Expansions
/pic8792519.jpg) Dorfromantik: Sakura – Japolonia 2025
Dorfromantik: Sakura – Japolonia 2025