Table Talk
Nothing here yet. Love this design? Say so - the designer might see it.

Project L: 3D Printed Board Game Organizer

Inserts Free
Plan Your Print
About 710 g of filament From the designer's print profile
Print Profile 16h 48m 710 g PLA
What it takes
6 plates 16h 48m 710 g PLA
P1S, X1E, X1 Carbon, H2S, A1, A2L, X1, H2C, P1P, H2D, H2D Pro, P2S, X2D
As promised, here is the Project L (3D Printable Version) board game organizer! NOTE: This does not fit the retail version of the game The organizer is designed to fit the base game and all future expansions. Designed to be both a organizer for transporting and storing the game but also to help aid in game play. Some assembly required. No magnets, glue or screws required (although glue and magnets are optional) Assembly Steps (Visual aid and instruction guide to come later): • If not using magnets, skip this step; glue 2 10x1mm magnets into lower lid and upper lid slots. • If not using glue, skip this step; apply glue to pocket of lower lid • Connect lower lid to upper lid (let glue dry if used) • Insert left lock piece into lower lid pocket and push through slot into the lower lid (use a pencil/pen/screwdriver or some long thin cylindrical object as an aid) • Insert the left lock lock piece into the pocket to retain the left lock piece • Insert right lock piece (may be difficult, due to slight angle on tab but just push and will go eventually, use aid from step 4 to help) • Inert the right lock lock piece into the pocket to retain the right lock piece • If not using decals, skip this step, if not using magnets, skip this step; glue magnets into the upper and lower lid as well as the upper and lower lid decals (let dry) • If not using glue, skip this step, apply glue to decals (magnets will automatically align the pieces, if not using magnets, ensure the L is aligned as best as possible) • If not using glue or details, skip this step; apply glue to outline decals and place onto upper and lower lids using the edge of the lids as a guide • Place trays into the organizer • Place lid on top of the organizer • Game If glue is not used on anything, it is possible to completely disassemble the entirety of the organizer. Just use a small long cylindrical device (pencil, pen, screwdriver; whatever was used for the assembly aid) and push on the lock locking pieces from the bottom, and then remove the locking pieces and the two halves come apart It is also possible to separate the top and bottom half without disassembly by rotating the top half clockwise relative to the bottom half (glue will prevent this if its a concern for normal use). Links to the game: https://makerworld.com/en/models/1688553-project-l-board-game#profileId-1789667
Plate Details (6)
0.4 mm nozzle, all plates
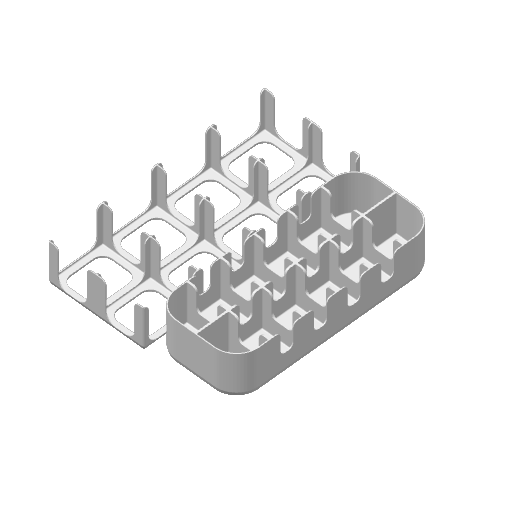
Plate 1 · Tile & Pieces Tray
4h 43m 155 g PLA · 155 g
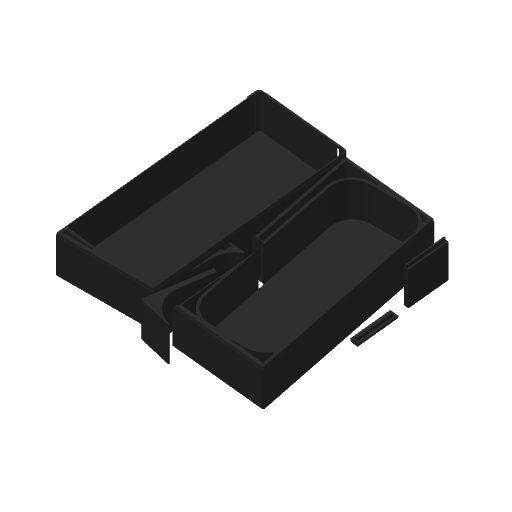
Plate 2 · Main Body + Locking Pieces
7h 7m 329 g PLA · 329 g
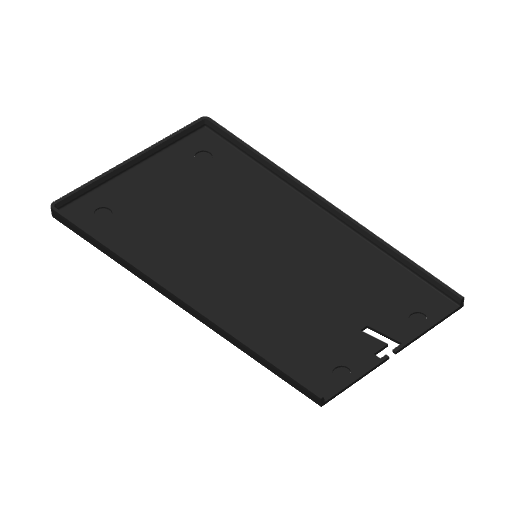
Plate 3 · Upper Lid
1h 14m 57 g PLA · 57 g
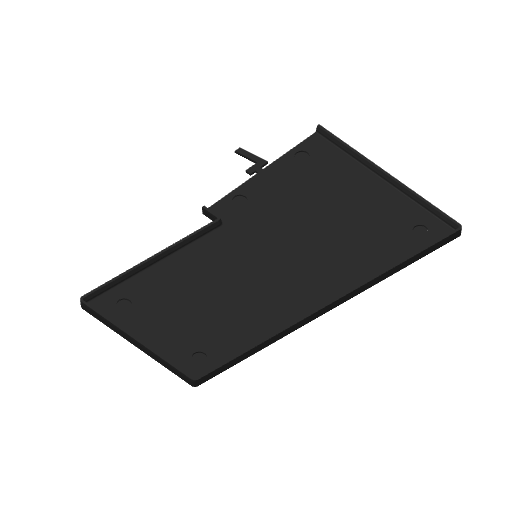
Plate 4 · Lower Lid
1h 30m 71 g PLA · 71 g
Plate 5 · L Lid Decal Outline (Optional)
17m 5 g PLA · 5 g
Plate 6 · L Lid Part (Optional)
1h 56m 93 g PLA · 93 g
Designer's Description

As promised, here is the Project L (3D Printable Version) board game organizer!

NOTE: This does not fit the retail version of the game

The organizer is designed to fit the base game and all future expansions. Designed to be both a organizer for transporting and storing the game but also to help aid in game play.

Some assembly required. No magnets, glue or screws required (although glue and magnets are optional)

Assembly Steps (Visual aid and instruction guide to come later):

  • If not using magnets, skip this step; glue 2 10x1mm magnets into lower lid and upper lid slots.
  • If not using glue, skip this step; apply glue to pocket of lower lid
  • Connect lower lid to upper lid (let glue dry if used)
  • Insert left lock piece into lower lid pocket and push through slot into the lower lid (use a pencil/pen/screwdriver or some long thin cylindrical object as an aid)
  • Insert the left lock lock piece into the pocket to retain the left lock piece
  • Insert right lock piece (may be difficult, due to slight angle on tab but just push and will go eventually, use aid from step 4 to help)
  • Inert the right lock lock piece into the pocket to retain the right lock piece
  • If not using decals, skip this step, if not using magnets, skip this step; glue magnets into the upper and lower lid as well as the upper and lower lid decals (let dry)
  • If not using glue, skip this step, apply glue to decals (magnets will automatically align the pieces, if not using magnets, ensure the L is aligned as best as possible)
  • If not using glue or details, skip this step; apply glue to outline decals and place onto upper and lower lids using the edge of the lids as a guide
  • Place trays into the organizer
  • Place lid on top of the organizer
  • Game

If glue is not used on anything, it is possible to completely disassemble the entirety of the organizer. Just use a small long cylindrical device (pencil, pen, screwdriver; whatever was used for the assembly aid) and push on the lock locking pieces from the bottom, and then remove the locking pieces and the two halves come apart

It is also possible to separate the top and bottom half without disassembly by rotating the top half clockwise relative to the bottom half (glue will prevent this if its a concern for normal use).

Links to the game: https://makerworld.com/en/models/1688553-project-l-board-game#profileId-1789667

gamer gameraccessories gameaccessories
Project L box art Project L 2020 Layer by Layer
Cover Colors

Main colors from the cover art. Find matching filament, or tap swatches to narrow.

Matching filament