Log in to join the conversation.
Small parts routing jig (for hexagonal tiles but also more)
Please support ljhms by Liking/Boosting their Print on Printables.
Jig for safely chamfering small components using a routing table. Pieces are held firmly by two wedge shapes locking each other in place. They can be locked very securely using a mallet, but I found that even pushing them together with your bare hands was sufficient for routing.
I created this specifically to fit 12 hexagonal pieces with (minimal) diameter 32mm and height 6.6 mm, but the design can be adapted to fit other dimensions or profiles.
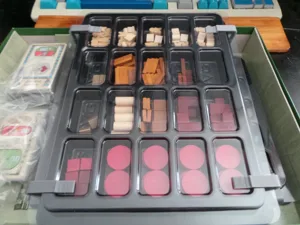
The result can be seen in the image to the right. These are the BoardgameGeek deluxe pieces for the game Yellow & Yangtze , which had a number of production issues. One of these was the sharp edges on the bottom of the pieces, which risked scratching the already fragile printing on top. After chamfering, the pieces look much nicer.
I wanted this jig to have the following characteristics:
• Safety, getting your fingers far away from the death blades
• Quick operation when locking or unlocking the jig
• Ability to hold many pieces at once, for batch operation
• At least some tolerance to differences in dimensions, when not all parts in a batch are perfectly identical
• Sufficient rigidity to clamp the pieces both in the forward-backward direction and the up-down direction
• Locking and unlocking the jig several times without causing abrasion and risking damage to the finish of the pieces it holds. All sides of the hexagonal pieces I used this with needed chamfering, which meant that had to open the jig to rotate the pieces six times per batch
• Good printability and sufficient strength given the forces locking the jig shut
• Each piece needs to fit on my Prusa i3 mk3
The printed parts themselves should not need any post-processing, but I did leave some clearance in both the forward-backward and up-down dimensions. This needs to be filled with a non-abrasive and compliant spacer. I happened to have some sheets of cork at home, which I cut into strips and glued along the inner edges of the push-bars and to the very edge of the lids using wood glue. Other options for you might be TPU or some semi-rigid poron foam (as sometimes found as packing material in boxes for computer peripherals or similar). Strips of thin foamcore with the paper backing removed might also work.
I recommend not making the strips along the lid too wide, as this might cantilever the pieces in the jig somewhat (pressing down harder on the back of the pieces rather than the front, which is what actually goes against the router bit). With thin strips you instead push down the front.
Cork strips on the lids and push-bars. I cut mine to wide at first and had to cut the excess away, hence the residue left over on the side.
• Place your pieces in the slots on either side of the jig.
Ideally, you do not want to leave any empty slots if it can be avoided, since this will cause the router to eat into the jig itself (which isn't the end of the world, it functions well even with some slight router damage to the bottom).
• Put the push bars behind your rows pieces
• Slide the two wedge-shaped lid pieces into the horizontal track in the middle. Push them together until they will go no further, making sure that the lids cover all of the pieces (that is, that the two lids meet roughly in the center of the jig and not off to either side). If needed, tap the sides of the lids with a soft mallet to lock it tight.
• Route the pieces.
I found it best not to use a fence since this did not give good results for pieces that were slightly out of dimension or angle on some of their sides while the rest of the pieces in the batch were not. Instead, I opted for freehand routing, letting the bearing ride across the side of the hexagonal pieces ( not along the side of the lid ). This way, the router followed the profile of each of the pieces individually, giving a consistent result.
• Open up the jig. If you used a mallet to lock it down, you might need to use it again to unlock it.
• Rotate the pieces and repeat until you have routed all the sides that you needed to.
To prevent tearout, it is recommended to always end your routing with a cut that goes with the grain of the wood. This means that the way you set the pieces up for the first cut and the direction you rotate them between cuts matters. In order to help with this, I have included markings on the jig showing both the direction of the grain and the direction to rotate the pieces between cuts. Here is how to use them:
• When preparing the first cut, place the pieces so that the grain is parallel to the grain marker. (If none of the edges of the piece are exactly parallel to the marker, try to line it up as close to parallel as possible.)
• Always rotate the pieces in a counter-clockwise direction.
Following these rules ensures that the final cut will always be along the grain (or, in the case where your grain is perpendicular to one of the sides, at the very least in the least-bad angle relative to the grain). Another little bonus is that it helps you be systematic and avoids you ending up forgetting one or more sides of pieces when routing a huge number of batches and having to go back and fix up your work (ask me how I know).
Please follow all the commonly cited safety routines for router tables. While the intent of this design is to increase safety, do not blindly follow any of my instructions if they go against your better judgement or knowledge. I am very much a beginner when it comes to woodworking and just because I myself did not run into an accident using this jig does not mean that there aren't failure cases I haven't considered. Feel free to let me know in the comments if you think of any, and I will try to highlight them here in the description as soon as I can.
It's been a long time coming, but I finally finished my project of chamfering the sharp edges of the BGG deluxe tokens using a special-purpose routing table jig I designed. Here is the jig, half-assembled. Had to do some last minute CAD design on the jig with a bandsaw, so please ignore the torn edges of the lid pieces :) And here is what the finished result looks like. The obtuse edges should help protect against the issue with the print getting damaged a bit. Still need to apply some coats of varnish, which should give more protection. Link here: